Orenstein & Koppel 0-6-0 ‘Polly Suzanne’ Kit Build by Ray Wilton
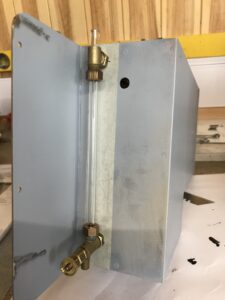
Well, I thought i’d forget something. I bought a water level gauge for the side tank a few years ago and forgot all about it.
Just found it in the box of bits so had to drill two holes in the newly primed side tank. At least I found it before the top coats go on. Not too much damage done, just a bit of scuffing on the primer where the drill chuck rubbed against the side.
For cutting the glass tube I use a “V2 needle file to score right around the tube at the length required (maybe around a couple of times) until a scored mark appears and then just snap off at that point. Obviously use eye protection and gloves. If the edge is a bit rough the tube can be annealed, but if you’re careful that may not be necessary.
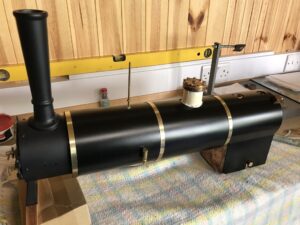
More progress, boiler cladding on and I must say i’m rather pleased with the result. After springing the boiler cladding to get it over the boiler it was quite difficult to get the cladding tight around the boiler and the bands on.
It took a bit of time with lots of cardboard and bits of paper to protect the paintwork while i pulled the cladding in with some rather large jubilee clips before fitting the boiler bands and clamping screws fitted but it was worth the effort.
Work continues, all be it a bit slowly. You know the saying ‘like watching paint dry’, well that’s all I seem to be doing these last few days.
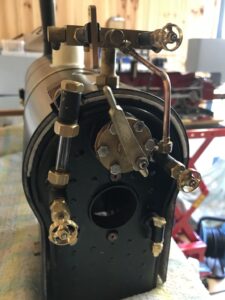
The side tanks have been filled and the primer touched up, Clacks painted and fitted to the boiler and made a start building up the Backhead after first painting with heat resistant paint.
Hmm, must tidy up that gasket on the regulator flange.
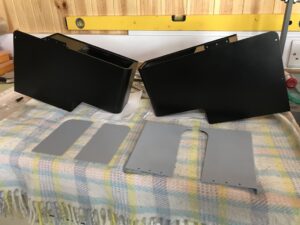
After a few coats of paint on the tanks it was clear they needed more rubbing down to get rid of a few screw heads that were still showing through.
Thats been done today and I’m waiting now for the wind to die down before adding a few more coats.
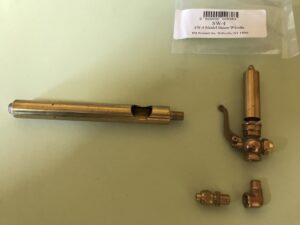
In the meantime another find in the box of bits i’d forgotten about.
The whistle on the left is the standard supply that is mounted under the footplate, but I wanted something more in keeping with the loco. I found the whistle on the right (can’t remember where, it was a long time ago) and with a few extra holes mounted it in the cab front.
There’s still some fettling to do on the cab front where it fits over the boiler but that will have to wait until the boiler is fitted between the frames and side tanks fitted.
This painting malarkey is never ending. After spraying a few coats of satin black on the tanks things were starting to look a lot better. No sign of screw heads so a total of six coats were applied. Also managed to get some etch primer on the tank lids and cab sides.
Another day in the workshop. This time actually making things instead of painting.
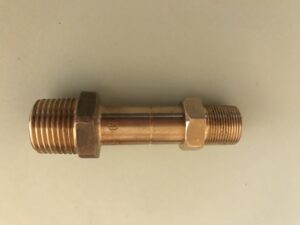
First off an adaptor from a 5/8″x26 tpi blanking plug and a 1/2″ BSP to 15mm tail piece connector to screw into the boiler safety valve fitting to allow my hydraulic pump to be connected for a pressure test. Just need to silver solder the two together.
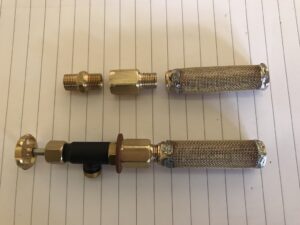
The kit of parts doesn’t include any water filters for the injector and axel pump feeds so I made up two new backing nut adaptors and screw on water filters for the tank fittings.
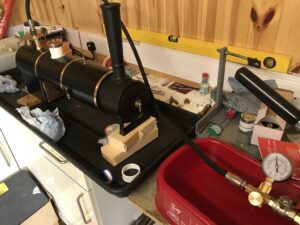
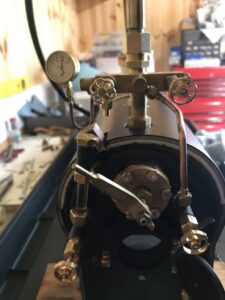
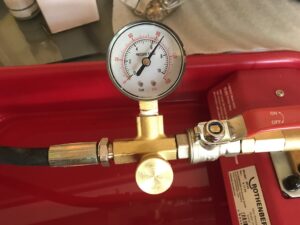
Bit of a milestone today, for me anyway. With all the Boiler fittings now done time to fill it with water and put some pressure in it. The Rothenberger Pressure tester I use is on the right.
A bit blurred but you can just make out the pressure gauge on the manifold showing 90psi .