Orenstein & Koppel 0-6-0 ‘Polly Suzanne’ Kit Build by Ray Wilton
This ones been hanging around my workshop for a few years. I bought it as a complete set of kits from someone down south that never got around to building it.
Needless to say when i got it home and checked all the parts from the lists there were a few bits missing. Polly Engineering were very helpful and supplied all the missing bits in a matter of days.
So to date the chassis is more or less complete, the last job i did over year or so ago was to set the timing for the valve gear.
Just need to put the valve covers on and check it runs on air.
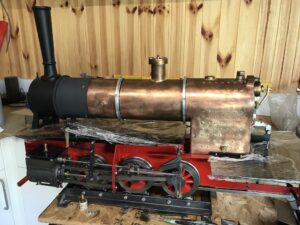
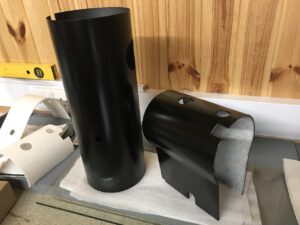
So to make the most of the good weather over the last few days I managed to get a few coats of etch primer on the boiler cladding. I don’t have a spray booth and only a small model airbrush so resorted to using a rattle can of UPOL Acid 8 outside. The still air and warm temperature helped drying quickly and the finish looks ok to take the top coats.
I have some satin black cans of spray on order for the cladding, hopefully they’ll be here by the end of the week.
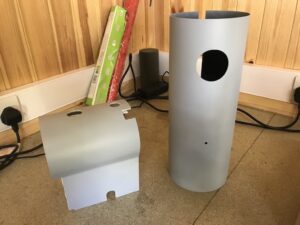
Next job is to take the temporarily fitted smokebox off the boiler and reseal it with some high temperature silicon. I bought this a few years ago, hope its not gone off!
As expected the high temperature silicon I was going to use to seal the smokebox to the boiler has gone off so its off to eBay to see if I can get some delivered.
I had set the timing over a year or so ago so I thought i’d better recheck it before fitting the valve covers. Seems to be OK, so covers are now on and I just need to make a adaptor to attach the air hose from my compressor. It’s only a small model for airbrushing really so it might not have enough oomph to run the loco, we’ll see.
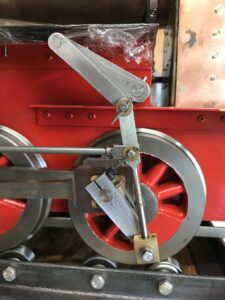
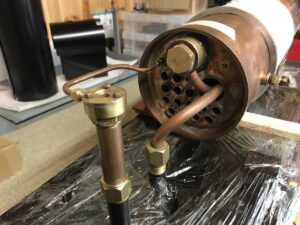
Keith was asking what the valve gear was, I’ve no idea so here a close up.
I managed to get my small airbrush compressor connected to the steam pipe of the Koppel.
I wasn’t expecting much as i hadn’t even put the gland packing in for the piston and valve.
To my surprise after about 30 seconds of switching the compressor on the chassis burst into life.
Not for long before the reservoir run dry but long enough to prove that the thing works in both directions.
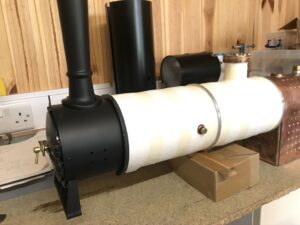
I managed to get a couple of coats of Satin Black on the Firebox Wrapper yesterday and started cutting up the ceramic sheet insulation for the boiler.
Theres a few blemishes that need rubbing down on the wrapper and it could do with a few more coats. Thats going to have to wait until the wind dies down.

Managed to get the final coats of paint on the cladding before it started raining today.
The smoke box has been removed and the superheater and blower pipe installed on the boiler prior to refitting. I’ve replaced the usual blower pipe and nozzle supplied with a multi jet blower.
Next job is to refit the smokebox sealing it to the boiler with high temperature silicon.
Smokebox refitted with sealant to boiler and Insulation fitted but I wasn’t happy with the insulation not covering the smokebox up to the end of the Boiler Cladding so redid this.
I need to let the paint harden on the cladding before fitting to the boiler. The tube needs to be sprung quite a bit to get it over the boiler so hope it doesn’t crack the paint in doing so. Another member didn’t have a problem with his ‘Douglas’ but he had it painted with epoxy resin. We’ll see.
.
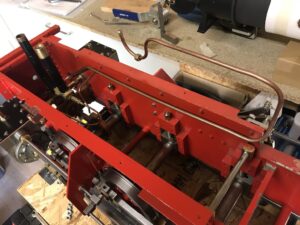
Started pipe work from axel pump. The pipe comes supplied with the nipples fitted to both ends so bending it to get the ends to line up is a bit of a pain.
Not having a decent pipe bender also doesn’t help. I say not having, I actually have two, one for small pipes up to 4mm and the other more suitable for hydraulic brake pipes on vehicles. The pipe work on the loco seems to be between the two.
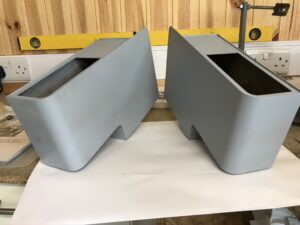
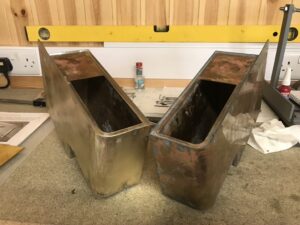
So to keep busy i’ve made start preparing the side tanks for painting. These have a liberal amount of solder around all the joints and the screw heads so quite a bit of scraping and filing required. The photo shows before and after scraping. Once the second tank is scraped and both sanded i’ll give then a few coats of etch primer.
Question? Is etch primer effective on Brass?
Answer: so long as you use etch primer suitable for non ferrous metals yes, the idea is that its slightly acidic therfore bonds itself to the metal rather than just laying on top of it but not strong enough to eat into it and weaken it or convert it into another compound. The Upol acid 8 etch primer data sheet metions “metal such as steel and aluminium” but doesn’t mention non ferrous metals so I would check with manufacturer.
Blackgates PQ1 say it is suitable for non ferrous metals but check first.
I thought i’d done a good job of scraping, filing and sanding the tanks ready for the primer.
It wasn’t until the primer was on that a few of the countersunk screws were showing to be slightly proud and the slots in some of the screw heads weren’t quite filled with solder.
The proud heads have been filed back, sanded and touched up with primer but not sure how to go about filling the screw head slots. I don’t think they’re deep enough to take a filler (not any that i’ve got anyway) so I might try a few coats of primer laid in with a brush and sand back.
I have been advised that knifing stopper is the stuff to use so thats now on order.